1. 客户端启动
服务端启动已经说完了,接下来看下客户端启动,有了之前的经验,现在看客户端会容易的很多:
public class SomeClient {
    public static void main(String[] args) throws InterruptedException {
        NioEventLoopGroup group = new NioEventLoopGroup();
        try {
            Bootstrap bootstrap = new Bootstrap();
            bootstrap.group(group)
                    .channel(NioSocketChannel.class)
                    //客户端可以指定自己的 主机名 和 端口号
                    //主机名不能随便写,要和自己机器上DNS一样
                    .localAddress("myNettyClient", 8000)
                    .handler(new ChannelInitializer<SocketChannel>() {
                        @Override
                        protected void initChannel(SocketChannel ch) throws Exception {
                            ChannelPipeline pipeline = ch.pipeline();
                            pipeline.addLast(new StringDecoder());
                            pipeline.addLast(new StringEncoder());
                            pipeline.addLast(new SomeClientHandler());
                        }
                    });

            ChannelFuture future = bootstrap.connect("localhost", 8888).sync();
            future.channel().closeFuture().sync();
        } finally {
            group.shutdownGracefully();
        }
    }
}
NioEventLoopGroup就不用分析了,和服务端一样。只要看连接connect方法:
public class Bootstrap extends AbstractBootstrap<Bootstrap, Channel> {
...
//io.netty.bootstrap.Bootstrap#connect
    public ChannelFuture connect(String inetHost, int inetPort) {
        return connect(InetSocketAddress.createUnresolved(inetHost, inetPort));
    }
    public ChannelFuture connect(SocketAddress remoteAddress) {
        if (remoteAddress == null) {
            throw new NullPointerException("remoteAddress");
        }

        validate();
        //localAddress之前Demo演示过可以指定本地主机端口和主机名
        return doResolveAndConnect(remoteAddress, config.localAddress());
    }

    public Bootstrap validate() {
        super.validate();
        //验证,这个handler就是bootstrap.handle指定的ChannelInitializer
        if (config.handler() == null) {
            throw new IllegalStateException("handler not set");
        }
        return this;
    }
    //io.netty.bootstrap.AbstractBootstrap#validate
    public B validate() {
    //EventLoopGroup不能为空
        if (group == null) {
            throw new IllegalStateException("group not set");
        }
        //ChannelFactory不能为空
        if (channelFactory == null) {
            throw new IllegalStateException("channel or channelFactory not set");
        }
        return self();
    }
}
看下核心方法io.netty.bootstrap.Bootstrap#doResolveAndConnect
//io.netty.bootstrap.Bootstrap#doResolveAndConnect
private ChannelFuture doResolveAndConnect(final SocketAddress remoteAddress, final SocketAddress localAddress) {
    // 创建并初始化了channel,然后将channel注册到了selector
    final ChannelFuture regFuture = initAndRegister();
    final Channel channel = regFuture.channel();

    // 若异步操作完成
    if (regFuture.isDone()) {
    // 如果异步操作失败直接返回
        if (!regFuture.isSuccess()) {
            return regFuture;
        }
        // 解析地址,并连接Server
        return doResolveAndConnect0(channel, remoteAddress, localAddress, channel.newPromise());
    } else {
        // Registration future is almost always fulfilled already, but just in case it's not.
        //promise之前有说过,是一个可修改的异步结果
        final PendingRegistrationPromise promise = new PendingRegistrationPromise(channel);
        regFuture.addListener(new ChannelFutureListener() {
            @Override
            public void operationComplete(ChannelFuture future) throws Exception {
                // Directly obtain the cause and do a null check so we only need one volatile read in case of a
                // failure.
                Throwable cause = future.cause();
                if (cause != null) {
                    // Registration on the EventLoop failed so fail the ChannelPromise directly to not cause an
                    // IllegalStateException once we try to access the EventLoop of the Channel.
                    promise.setFailure(cause);
                } else {
                    // Registration was successful, so set the correct executor to use.
                    // See https://github.com/netty/netty/issues/2586
                    promise.registered();
                    // 解析地址,并连接Server
                    doResolveAndConnect0(channel, remoteAddress, localAddress, promise);
                }
            }
        });
        return promise;
    }
}
这里分两步:
- 初始化并注册channel
- 解析地址,并连接Server
1.1 初始化并注册channel
final ChannelFuture regFuture = initAndRegister();这个方法调用的是抽象类
io.netty.bootstrap.AbstractBootstrap#initAndRegister方法,这个和Server端是完全一样的逻辑
- 创建一个channel
- 初始化channel
- 将当前channel注册给selector
//io.netty.bootstrap.AbstractBootstrap#initAndRegister
final ChannelFuture initAndRegister() {
    Channel channel = null;
    try {
        // 创建一个channel
        channel = channelFactory.newChannel();
        // 初始化channel
        init(channel);
    } catch (Throwable t) {
...
    }

    // 将当前channel注册给selector
    ChannelFuture regFuture = config().group().register(channel);
    if (regFuture.cause() != null) {
        if (channel.isRegistered()) {
            channel.close();
        } else {
            channel.unsafe().closeForcibly();
        }
    }

    return regFuture;
}
和Server端的区别有两个:
- 第一是channelFactory.newChannel()创建的通道是io.netty.channel.socket.nio.NioSocketChannel
- 第二就是init初始化方法的实现,客户端用的是io.netty.bootstrap.Bootstrap,所以要看io.netty.bootstrap.Bootstrap#init方法
//io.netty.bootstrap.Bootstrap#init
void init(Channel channel) throws Exception {
    // 将handler放入pipeline
    ChannelPipeline p = channel.pipeline();
    p.addLast(config.handler());
    // 使用option初始化
    final Map<ChannelOption<?>, Object> options = options0();
    synchronized (options) {
        setChannelOptions(channel, options, logger);
    }
    // 使用attr初始化
    final Map<AttributeKey<?>, Object> attrs = attrs0();
    synchronized (attrs) {
        for (Entry<AttributeKey<?>, Object> e: attrs.entrySet()) {
            channel.attr((AttributeKey<Object>) e.getKey()).set(e.getValue());
        }
    }
}
最重要的区别就是初始化channel的方法,客户端只会设置option,attr,handler。 而服务端还会在channel的ChannelPipeline中添加一个特殊ChannelInitializer,其中会再次向pipeline中添加ServerBootstrapAcceptor处理器,该处理器用于处理client的连接,一旦客户端来连接,该处理器的channelRead方法就会被触发,可以直接接受到对应客户端的Channel通道对象,然后通过child的option,attr,handler进行初始化,并通过child的NioEventLoopGroup.register进行注册
1.2 解析地址,并连接Server
channel注册成功后会执行 解析地址,并连接Server 的方法:
//io.netty.bootstrap.Bootstrap#doResolveAndConnect0
private ChannelFuture doResolveAndConnect0(final Channel channel, SocketAddress remoteAddress,final SocketAddress localAddress, final ChannelPromise promise) {
    try {
        // 获取到当前channel所绑定的eventLoop
        final EventLoop eventLoop = channel.eventLoop();
        // 创建一个地址解析器(其中封装着一个格式匹配器)
        final AddressResolver<SocketAddress> resolver = this.resolver.getResolver(eventLoop);

        // 若地址解析器不支持指定的Server的地址,或该地址已经被解析过了
        if (!resolver.isSupported(remoteAddress) || resolver.isResolved(remoteAddress)) {
            // Resolver has no idea about what to do with the specified remote address or it's resolved already.
            // 解析器不知道如何处理指定的远程地址,或者它已经被解析。
            doConnect(remoteAddress, localAddress, promise);
            return promise;
        }

        // 解析Server地址:将主机名映射为ip
        final Future<SocketAddress> resolveFuture = resolver.resolve(remoteAddress);

        // 若异步操作直接结束:成功,或异常
        if (resolveFuture.isDone()) {
            final Throwable resolveFailureCause = resolveFuture.cause();

            // 若异常,则关闭channel,修改异步结果
            if (resolveFailureCause != null) {
                // Failed to resolve immediately
                channel.close();
                promise.setFailure(resolveFailureCause);
            } else {
                // Succeeded to resolve immediately; cached? (or did a blocking lookup)
                // 若成功,则连接Server
                // resolveFuture.getNow()  直接获取异步结果
                doConnect(resolveFuture.getNow(), localAddress, promise);
            }
            return promise;
        }

        // Wait until the name resolution is finished.
        // 为异步操作添加监听器:异步操作结束:成功,或异常
        resolveFuture.addListener(new FutureListener<SocketAddress>() {
            @Override
            public void operationComplete(Future<SocketAddress> future) throws Exception {
                if (future.cause() != null) {
                    channel.close();
                    promise.setFailure(future.cause());
                } else {
                    doConnect(future.getNow(), localAddress, promise);
                }
            }
        });
    } catch (Throwable cause) {
        promise.tryFailure(cause);
    }
    return promise;
}
上面异步操作的处理就不说了,一共三个核心流程:
- final AddressResolver resolver = this.resolver.getResolver(eventLoop); — 创建地址解析器
- final Future resolveFuture = resolver.resolve(remoteAddress); —解析地址
- doConnect(resolveFuture.getNow(), localAddress, promise); —连接Server
1.2.1 创建地址解析器
final AddressResolver resolver = this.resolver.getResolver(eventLoop);
public abstract class AddressResolverGroup<T extends SocketAddress> implements Closeable {
...
/**
     * Note that we do not use a {@link ConcurrentMap} here because it is usually expensive to instantiate a resolver.
     * 注意,我们在这里没有使用{@link ConcurrentMap},因为实例化一个解析器通常开销很大。
     */
    private final Map<EventExecutor, AddressResolver<T>> resolvers =
            new IdentityHashMap<EventExecutor, AddressResolver<T>>();

    public AddressResolver<T> getResolver(final EventExecutor executor) {
        if (executor == null) {
            throw new NullPointerException("executor");
        }

        if (executor.isShuttingDown()) {
            throw new IllegalStateException("executor not accepting a task");
        }

        AddressResolver<T> r;
        synchronized (resolvers) {
            r = resolvers.get(executor);
            if (r == null) {
                final AddressResolver<T> newResolver;
                try {
                //创建解析器,一个抽象方法具体实现在子类
                    newResolver = newResolver(executor);
                } catch (Exception e) {
                    throw new IllegalStateException("failed to create a new resolver", e);
                }
//可以看出来一个EventLoop对应一个专门的解析器
                resolvers.put(executor, newResolver);
                //添加一个监听器
                executor.terminationFuture().addListener(new FutureListener<Object>() {
                    @Override
                    //当executor被终止时这个方法会被触发,即删除executor对应的解析器
                    public void operationComplete(Future<Object> future) throws Exception {
                        synchronized (resolvers) {
                            resolvers.remove(executor);
                        }
                        newResolver.close();
                    }
                });

                r = newResolver;
            }
        }

        return r;
    }

    protected abstract AddressResolver<T> newResolver(EventExecutor executor) throws Exception;
    ...
}
我们看下resolver是谁就能知道newResolver = newResolver(executor)创建的解析器是什么:
public class Bootstrap extends AbstractBootstrap<Bootstrap, Channel> {
...
private static final AddressResolverGroup<?> DEFAULT_RESOLVER = DefaultAddressResolverGroup.INSTANCE;

private volatile AddressResolverGroup<SocketAddress> resolver = (AddressResolverGroup<SocketAddress>) DEFAULT_RESOLVER;
...
}
这个resolver就是DefaultAddressResolverGroup.INSTANCE
public final class DefaultAddressResolverGroup extends AddressResolverGroup<InetSocketAddress> {

    public static final DefaultAddressResolverGroup INSTANCE = new DefaultAddressResolverGroup();

    private DefaultAddressResolverGroup() { }

    @Override
    protected AddressResolver<InetSocketAddress> newResolver(EventExecutor executor) throws Exception {
        return new DefaultNameResolver(executor).asAddressResolver();
    }
}
看下asAddressResolver返回的是什么
public abstract class InetNameResolver extends SimpleNameResolver<InetAddress> {
    private volatile AddressResolver<InetSocketAddress> addressResolver;
...
    public AddressResolver<InetSocketAddress> asAddressResolver() {
        AddressResolver<InetSocketAddress> result = addressResolver;
        if (result == null) {
            synchronized (this) {
                result = addressResolver;
                if (result == null) {
                    addressResolver = result = new InetSocketAddressResolver(executor(), this);
                }
            }
        }
        return result;
    }
}
可以看出来解析器用的就是io.netty.resolver.InetSocketAddressResolver
1.2.2 解析地址
final Future resolveFuture = resolver.resolve(remoteAddress);
//io.netty.resolver.AbstractAddressResolver#resolve(java.net.SocketAddress)
public final Future<T> resolve(SocketAddress address) {
//先判断支不支持,不支持直接返回不支持处理
    if (!isSupported(checkNotNull(address, "address"))) {
        // Address type not supported by the resolver
        return executor().newFailedFuture(new UnsupportedAddressTypeException());
    }
//如果已经解析过了直接赋值返回
    if (isResolved(address)) {
        // Resolved already; no need to perform a lookup
        @SuppressWarnings("unchecked")
        final T cast = (T) address;
        return executor.newSucceededFuture(cast);
    }

    try {
        @SuppressWarnings("unchecked")
        final T cast = (T) address;
        final Promise<T> promise = executor().newPromise();
        // 解析Server地址
        doResolve(cast, promise);
        return promise;
    } catch (Exception e) {
        return executor().newFailedFuture(e);
    }
}

//io.netty.resolver.AbstractAddressResolver#doResolve
protected abstract void doResolve(T unresolvedAddress, Promise<T> promise) throws Exception;
doResolve是一个抽象方法,具体实现在子类,之前我们已经分析过resolver是io.netty.resolver.InetSocketAddressResolver:
public class InetSocketAddressResolver extends AbstractAddressResolver<InetSocketAddress> {
...
    @Override
    protected void doResolve(final InetSocketAddress unresolvedAddress, final Promise<InetSocketAddress> promise)
            throws Exception {
        // Note that InetSocketAddress.getHostName() will never incur a reverse lookup here,
        // because an unresolved address always has a host name.
        // 注意,InetSocketAddress.getHostName()在这里不会导致反向查找,因为未解析的地址总是有主机名。
        // 上面注释意思因为InetSocketAddress.getHostName()方法有这样的机制:
        // 如果InetSocketAddress给的是主机名则该方法直接返回主机名,
        // 如果给的是ip地址,则会进行ip地址反向查找返回主机名,即该方法总会返回主机名

        //这个nameResolver之前分析过程也能看到,就是DefaultNameResolver
        nameResolver.resolve(unresolvedAddress.getHostName())
                .addListener(new FutureListener<InetAddress>() {
                //解析操作是异步的,异步操作成功了会修改promise
                    @Override
                    public void operationComplete(Future<InetAddress> future) throws Exception {
                        if (future.isSuccess()) {
                            promise.setSuccess(new InetSocketAddress(future.getNow(), unresolvedAddress.getPort()));
                        } else {
                            promise.setFailure(future.cause());
                        }
                    }
                });
    }
    ...
}
nameResolver是DefaultNameResolver,resolve方法实现在其父类SimpleNameResolver
public abstract class SimpleNameResolver<T> implements NameResolver<T> {
...
    @Override
    public final Future<T> resolve(String inetHost) {
        final Promise<T> promise = executor().newPromise();
        return resolve(inetHost, promise);
    }
    ...
    public Future<T> resolve(String inetHost, Promise<T> promise) {
        checkNotNull(promise, "promise");

        try {
            doResolve(inetHost, promise);
            return promise;
        } catch (Exception e) {
            return promise.setFailure(e);
        }
    }

    protected abstract void doResolve(String inetHost, Promise<T> promise) throws Exception;
    ...
}
doResolve方法实现在子类DefaultNameResolver:
public class DefaultNameResolver extends InetNameResolver {
...
    @Override
    protected void doResolve(String inetHost, Promise<InetAddress> promise) throws Exception {
        try {
        //inetHost此时应是一个主机名
            promise.setSuccess(SocketUtils.addressByName(inetHost));
        } catch (UnknownHostException e) {
            promise.setFailure(e);
        }
    }
...
}
跟SocketUtils.addressByName(inetHost)方法:
//io.netty.util.internal.SocketUtils#addressByName
public static InetAddress addressByName(final String hostname) throws UnknownHostException {
    try {
//访问控制器,执行特权
//特权行为就是PrivilegedExceptionAction
        return AccessController.doPrivileged(new PrivilegedExceptionAction<InetAddress>() {
            @Override
            public InetAddress run() throws UnknownHostException {
                // 根据主机名获取到ip,这个是JDK提供的方法
                // 给定主机的名称,确定主机的IP地址。
                return InetAddress.getByName(hostname);
            }
        });
    } catch (PrivilegedActionException e) {
        throw (UnknownHostException) e.getCause();
    }
}
我们看下AccessController
/**
 * Performs the specified {@code PrivilegedExceptionAction} with
 * privileges enabled.  The action is performed with <i>all</i> of the
 * permissions possessed by the caller's protection domain.
 * 使用启用的特权执行指定的{@code PrivilegedExceptionAction}。
 * 该操作是通过调用者的保护域所拥有的所有 权限来执行的。
 *
 * 解释:只有具有all权限才能执行action
 */
@CallerSensitive
public static native <T> T doPrivileged(PrivilegedExceptionAction<T> action) throws PrivilegedActionException;

//另一个重载的方法,参数中就可以指定权限,只有拥有指定的这个权限才能运行action
//不指定的情况下是all权限
@CallerSensitive
public static <T> T doPrivileged(PrivilegedAction<T> action,AccessControlContext context, Permission... perms) {

    AccessControlContext parent = getContext();
    if (perms == null) {
        throw new NullPointerException("null permissions parameter");
    }
    Class <?> caller = Reflection.getCallerClass();
    DomainCombiner dc = (context == null) ? null : context.getCombiner();
    return AccessController.doPrivileged(action, createWrapper(dc,
        caller, parent, context, perms));
}
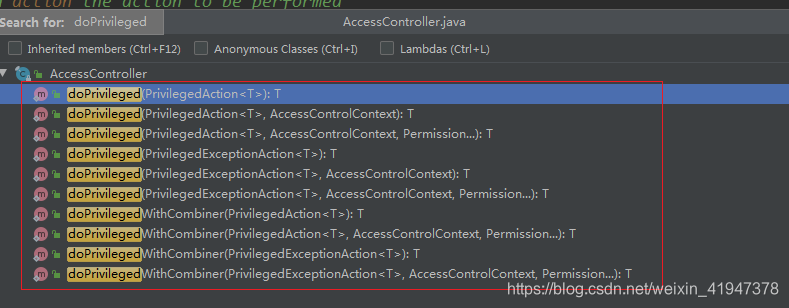
看下PrivilegedExceptionAction和PrivilegedAction的区别:
/**
 * A computation to be performed with privileges enabled.  The computation is
 * performed by invoking {@code AccessController.doPrivileged} on the
 * {@code PrivilegedAction} object.  This interface is used only for
 * computations that do not throw checked exceptions; computations that
 * throw checked exceptions must use {@code PrivilegedExceptionAction}
 * instead.
 * 在启用特权的情况下执行的计算。计算是通过在{@code PrivilegedAction}对象上调
 * 用{@code AccessController.doPrivileged}来执行的。此接口仅用于不会抛出已
 * 检查异常的计算;抛出受检查异常的计算必须使用{@code}代替。
 */

public interface PrivilegedAction<T> {
    T run();
}


/**
 * A computation to be performed with privileges enabled, that throws one or
 * more checked exceptions.  The computation is performed by invoking
 * {@code AccessController.doPrivileged} on the
 * {@code PrivilegedExceptionAction} object.  This interface is
 * used only for computations that throw checked exceptions;
 * computations that do not throw
 * checked exceptions should use {@code PrivilegedAction} instead.
 * 在启用特权的情况下执行的一种计算,它抛出一个或多个已检查异常。
 * 计算是通过在{@code PrivilegedExceptionAction}对象上调
 * 用{@code AccessController.doPrivileged}来执行的。
 * 此接口仅用于抛出已检查异常的计算;不抛出检查异常的计算应该使用{@code PrivilegedAction}代替。
 */

public interface PrivilegedExceptionAction<T> {
T run() throws Exception;
}
1.2.3 连接Server
doConnect(resolveFuture.getNow(), localAddress, promise);
- resolveFuture.getNow():返回的就是解析后的IP地址+端口号,是要连接的Server端的地址
- localAddress是本地的地址
//io.netty.bootstrap.Bootstrap#doConnect
private static void doConnect(
        final SocketAddress remoteAddress, final SocketAddress localAddress, final ChannelPromise connectPromise) {

    // This method is invoked before channelRegistered() is triggered.  Give user handlers a chance to set up
    // the pipeline in its channelRegistered() implementation.
    final Channel channel = connectPromise.channel();
    channel.eventLoop().execute(new Runnable() {
        @Override
        public void run() {
            if (localAddress == null) {
                channel.connect(remoteAddress, connectPromise);
            } else {
                channel.connect(remoteAddress, localAddress, connectPromise);
            }
            connectPromise.addListener(ChannelFutureListener.CLOSE_ON_FAILURE);
        }
    });
}
直接看connect方法,此时channel应该是NioSocketChannel,connect方法实现在其父类AbstractChannel:
//io.netty.channel.AbstractChannel#connect
public ChannelFuture connect(SocketAddress remoteAddress, ChannelPromise promise) {
    return pipeline.connect(remoteAddress, promise);
}
//io.netty.channel.DefaultChannelPipeline#connect
public final ChannelFuture connect(SocketAddress remoteAddress, ChannelPromise promise) {
    return tail.connect(remoteAddress, promise);
}
//io.netty.channel.AbstractChannelHandlerContext#connect
public ChannelFuture connect(SocketAddress remoteAddress, ChannelPromise promise) {
    return connect(remoteAddress, null, promise);
}
//io.netty.channel.AbstractChannelHandlerContext#connect
public ChannelFuture connect(final SocketAddress remoteAddress, final SocketAddress localAddress, final ChannelPromise promise) {

    if (remoteAddress == null) {
        throw new NullPointerException("remoteAddress");
    }
    if (isNotValidPromise(promise, false)) {
        // cancelled
        return promise;
    }
//pipline中找到下一个实现connect方法的节点
//节点的概念在后面pipline讲解的时候说
    final AbstractChannelHandlerContext next = findContextOutbound(MASK_CONNECT);
    //节点中也有执行器,重点下次说
    EventExecutor executor = next.executor();
    if (executor.inEventLoop()) {
        next.invokeConnect(remoteAddress, localAddress, promise);
    } else {
        safeExecute(executor, new Runnable() {
            @Override
            public void run() {
                next.invokeConnect(remoteAddress, localAddress, promise);
            }
        }, promise, null);
    }
    return promise;
}
//io.netty.channel.AbstractChannelHandlerContext#invokeConnect
private void invokeConnect(SocketAddress remoteAddress, SocketAddress localAddress, ChannelPromise promise) {
    if (invokeHandler()) {
        try {
            ((ChannelOutboundHandler) handler()).connect(this, remoteAddress, localAddress, promise);
        } catch (Throwable t) {
            notifyOutboundHandlerException(t, promise);
        }
    } else {
        connect(remoteAddress, localAddress, promise);
    }
}
继续跟((ChannelOutboundHandler) handler()).connect,这个ChannelOutboundHandler我们要跟的是头节点HeadContext(至于为什么后面讲pipline和Inbound、OutBound处理器的时候就明白了,先记住就好了):
//io.netty.channel.DefaultChannelPipeline.HeadContext#connect
public void connect(
        ChannelHandlerContext ctx,
        SocketAddress remoteAddress, SocketAddress localAddress,
        ChannelPromise promise) {
    unsafe.connect(remoteAddress, localAddress, promise);
}
//io.netty.channel.nio.AbstractNioChannel.AbstractNioUnsafe#connect
public final void connect(final SocketAddress remoteAddress, final SocketAddress localAddress, final ChannelPromise promise) {
    if (!promise.setUncancellable() || !ensureOpen(promise)) {
        return;
    }

    try {
        if (connectPromise != null) {
            // Already a connect in process.
            throw new ConnectionPendingException();
        }

        boolean wasActive = isActive();
        //doConnect连接方法
        if (doConnect(remoteAddress, localAddress)) {
            fulfillConnectPromise(promise, wasActive);
        } else {
...
        }
    } catch (Throwable t) {
        promise.tryFailure(annotateConnectException(t, remoteAddress));
        closeIfClosed();
    }
}


//io.netty.channel.socket.nio.NioSocketChannel#doConnect
protected boolean doConnect(SocketAddress remoteAddress, SocketAddress localAddress) throws Exception {
    if (localAddress != null) {
        // 将本地地址绑定到channel
        doBind0(localAddress);
    }

    boolean success = false;
    try {
        // 客户端的连接就绪指的是,一旦建立了连接,或者尝试连接失败,套接字通道都将变得可连接
        // 这个时候如果Selector.select注册了连接事件,就会发现其SelectionKey是可连接的
        // 连接Server
        boolean connected = SocketUtils.connect(javaChannel(), remoteAddress);
        if (!connected) {
        // 如果连接没有直接成功,则
            // 初始化当前channel的key感兴趣的操作为连接操作
            // 之后Selector监听到连接就绪事件后会继续尝试调用连接方法
            // java.nio.channels.SocketChannel#finishConnect然后完成连接
            // 在分析NioEventLoop任务执行的时候讲过
            selectionKey().interestOps(SelectionKey.OP_CONNECT);
        }
        success = true;
        return connected;
    } finally {
        if (!success) {
            doClose();
        }
    }
}
将本地地址绑定到channel,即客户端也可以指定本地绑定哪个端口和Server端进行连接:
//io.netty.channel.socket.nio.NioSocketChannel#doBind0
private void doBind0(SocketAddress localAddress) throws Exception {
    // 若当前JDK平台使用的版本>=7,则...
    if (PlatformDependent.javaVersion() >= 7) {
        SocketUtils.bind(javaChannel(), localAddress);
    } else {
        SocketUtils.bind(javaChannel().socket(), localAddress);
    }
}
//io.netty.util.internal.SocketUtils#bind
public static void bind(final SocketChannel socketChannel, final SocketAddress address) throws IOException {
    try {
        AccessController.doPrivileged(new PrivilegedExceptionAction<Void>() {
            @Override
            public Void run() throws IOException {
                socketChannel.bind(address);
                return null;
            }
        });
    } catch (PrivilegedActionException e) {
        throw (IOException) e.getCause();
    }
}
2. ChannelPipeline
channelPipeline本身是一个双向链表,默认有头head和尾tail节点
添加处理器,实际上先把处理器封装成节点context ,再加入到pipline中
添加也能删除
2.1 ChannelPipeline的创建
创建是在Channel初始化执行构造的时候,之前有跟过,这里以NioServerSocketChannel为例:
io.netty.channel.socket.nio.NioServerSocketChannel#NioServerSocketChannel(java.nio.channels.ServerSocketChannel)
io.netty.channel.nio.AbstractNioMessageChannel#AbstractNioMessageChannel
io.netty.channel.nio.AbstractNioChannel#AbstractNioChannel
io.netty.channel.AbstractChannel#AbstractChannel(io.netty.channel.Channel)
//io.netty.channel.AbstractChannel#AbstractChannel(io.netty.channel.Channel)
protected AbstractChannel(Channel parent) {
    this.parent = parent;
    // 为Netty的channel生成id
    id = newId();
    // 底层操作对象
    unsafe = newUnsafe();
    // 创建当前channel所绑定的channelPipeline
    pipeline = newChannelPipeline();
}
//io.netty.channel.AbstractChannel#newChannelPipeline
protected DefaultChannelPipeline newChannelPipeline() {
//this就是当前Channel
    return new DefaultChannelPipeline(this);
}
我们看下Pipline的构造做了什么:
//io.netty.channel.DefaultChannelPipeline#DefaultChannelPipeline
protected DefaultChannelPipeline(Channel channel) {
    this.channel = ObjectUtil.checkNotNull(channel, "channel");
    succeededFuture = new SucceededChannelFuture(channel, null);
    voidPromise =  new VoidChannelPromise(channel, true);
//两个头尾节点
    tail = new TailContext(this);
    head = new HeadContext(this);

    head.next = tail;
    tail.prev = head;
}
可以看到初始化pipline过程中会直接给pipline链的头和尾添加特殊的节点。
2.1.1 TailContext和HeadContext
无论头节点还是尾节点都会继承AbstractChannelHandlerContext:
abstract class AbstractChannelHandlerContext implements ChannelHandlerContext, ResourceLeakHint {

    private static final InternalLogger logger = InternalLoggerFactory.getInstance(AbstractChannelHandlerContext.class);
//当前节点的前后节点
//由此可以看出是节点之间组成的是一个双向链表结构
    volatile AbstractChannelHandlerContext next;
    volatile AbstractChannelHandlerContext prev;
    ...
}
即一个节点由三部分构成:前节点,后节点,当前节点数据
先看下尾节点:
注意TailContext也是一个ChannelInboundHandler,也是一个处理器,可以处理通道入栈相关事件
//看到继承自AbstractChannelHandlerContext
final class TailContext extends AbstractChannelHandlerContext implements ChannelInboundHandler {

    TailContext(DefaultChannelPipeline pipeline) {
        // 参数1:当前节点所要加入的pipeline
        // 参数2:当前节点封装的执行器executor,节点里的处理器就是通过executor执行的
        // 参数3:节点名称,简单类名+"#0",这里是tailContext#0
        // 参数4:节点类型
        super(pipeline, null, TAIL_NAME, TailContext.class);
        // 修改当前节点所封装处理器的状态
        setAddComplete();
    }

    //该方法实现在其父类AbstractChannelHandlerContext
    final boolean setAddComplete() {
        for (;;) {
        //先获取当前节点状态
            int oldState = handlerState;
            //如果当前状态是删除完成
            if (oldState == REMOVE_COMPLETE) {
                return false;
            }
            //状态不是删除完成则:
            // Ensure we never update when the handlerState is REMOVE_COMPLETE already.
            // oldState is usually ADD_PENDING but can also be REMOVE_COMPLETE when an EventExecutor is used that is not
            // exposing ordering guarantees.
            // CAS:Compare and Swap,即比较再交换
            //修改处理器状态为添加成功
            if (HANDLER_STATE_UPDATER.compareAndSet(this, oldState, ADD_COMPLETE)) {
                return true;
            }
        }
    }
    //看下几个比较重要的节点的方法的实现
@Override
    public void exceptionCaught(ChannelHandlerContext ctx, Throwable cause) {
    //io.netty.channel.DefaultChannelPipeline#onUnhandledInboundException
        onUnhandledInboundException(cause);
    }

    @Override
    public void channelRead(ChannelHandlerContext ctx, Object msg) {
    //io.netty.channel.DefaultChannelPipeline#onUnhandledInboundMessage
    //从通道读数据,一旦走到最后一个节点
        onUnhandledInboundMessage(msg);
    }
...

}

//io.netty.channel.DefaultChannelPipeline#onUnhandledInboundMessage
protected void onUnhandledInboundMessage(Object msg) {
    try {
        logger.debug(
                "Discarded inbound message {} that reached at the tail of the pipeline. " +
                        "Please check your pipeline configuration.", msg);
    } finally {
    //一旦走到最后一个节点
        // 释放msg
        ReferenceCountUtil.release(msg);
    }
}
//io.netty.channel.DefaultChannelPipeline#onUnhandledInboundException
protected void onUnhandledInboundException(Throwable cause) {
    try {
        logger.warn(
                "An exceptionCaught() event was fired, and it reached at the tail of the pipeline. " +
                        "It usually means the last handler in the pipeline did not handle the exception.",
                cause);
    } finally {
    //一旦走到最后一个节点,异常也会释放掉
        ReferenceCountUtil.release(cause);
    }
}
可以看出来,如果Channel的事件走到最后一个节点TailContext,它会负责处理很多的资源释放逻辑。
看下super构造AbstractChannelHandlerContext
abstract class AbstractChannelHandlerContext implements ChannelHandlerContext, ResourceLeakHint {

    AbstractChannelHandlerContext(DefaultChannelPipeline pipeline, EventExecutor executor,String name, Class<? extends ChannelHandler> handlerClass) {
        this.name = ObjectUtil.checkNotNull(name, "name");
        this.pipeline = pipeline;
        this.executor = executor;
        // 初始化执行标识
        // 即标记当前处理器的哪些方法需要执行
        this.executionMask = mask(handlerClass);
        // Its ordered if its driven by the EventLoop or the given Executor is an instanceof OrderedEventExecutor.
        ordered = executor == null || executor instanceof OrderedEventExecutor;
    }
    ...
}
重点关注一下标记逻辑,这个标记逻辑可以标记当前节点的处理器哪些方法可以执行,哪些方法永远不会执行,当调用在pipline中的节点的各个fire方法的时候会用到,下一章会讲,这里只是先标记了,但这个设计思路方案可以借鉴:
final class ChannelHandlerMask {
...

    /**
     * Return the {@code executionMask}.
     */
    static int mask(Class<? extends ChannelHandler> clazz) {
        // Try to obtain the mask from the cache first. If this fails calculate it and put it in the cache for fast
        // lookup in the future.
        Map<Class<? extends ChannelHandler>, Integer> cache = MASKS.get();
        //先从缓存取,以类为单位
        Integer mask = cache.get(clazz);
        if (mask == null) {
            mask = mask0(clazz);
            cache.put(clazz, mask);
        }
        return mask;
    }

    /**
     * Calculate the {@code executionMask}.
     */
    private static int mask0(Class<? extends ChannelHandler> handlerType) {
        // 初始化一个整数,代表含义是标记允许执行处理器的exeptionCaught方法
        // 即:使用了二进制数上的二进制位代表了每一个方法是否允许执行
        int mask = MASK_EXCEPTION_CAUGHT;

        try {
            // 解决当前处理器是InboundHandler的情况
            if (ChannelInboundHandler.class.isAssignableFrom(handlerType)) {
            //先做了一个与操作,ChannelInboundHandler对应的所有方法都标记为允许执行
            //然后依次判断ChannelInboundHandler中每个方法是否要跳过
            //如果跳过,则该处理器对应的方法就会标记为不允许执行
            //判断逻辑在isSkippable
                mask |= MASK_ALL_INBOUND;

                if (isSkippable(handlerType, "channelRegistered", ChannelHandlerContext.class)) {
                    mask &= ~MASK_CHANNEL_REGISTERED;
                }
                if (isSkippable(handlerType, "channelUnregistered", ChannelHandlerContext.class)) {
                    mask &= ~MASK_CHANNEL_UNREGISTERED;
                }
...
            }

            // 解决当前处理器是OutboundboundHandler的情况
            // 同理
            if (ChannelOutboundHandler.class.isAssignableFrom(handlerType)) {
                mask |= MASK_ALL_OUTBOUND;

                if (isSkippable(handlerType, "bind", ChannelHandlerContext.class,
                        SocketAddress.class, ChannelPromise.class)) {
                    mask &= ~MASK_BIND;
                }
                if (isSkippable(handlerType, "connect", ChannelHandlerContext.class, SocketAddress.class,
                        SocketAddress.class, ChannelPromise.class)) {
                    mask &= ~MASK_CONNECT;
                }
...
            }

            if (isSkippable(handlerType, "exceptionCaught", ChannelHandlerContext.class, Throwable.class)) {
                mask &= ~MASK_EXCEPTION_CAUGHT;
            }
        } catch (Exception e) {
            // Should never reach here.
            PlatformDependent.throwException(e);
        }

        return mask;
    }

    @SuppressWarnings("rawtypes")
    private static boolean isSkippable(final Class<?> handlerType, final String methodName, final Class<?>... paramTypes) throws Exception {
        return AccessController.doPrivileged(new PrivilegedExceptionAction<Boolean>() {
            @Override
            public Boolean run() throws Exception {
                // 若当前方法上出现了@Skip注解,则返回true,代表跳过
                return handlerType.getMethod(methodName, paramTypes).isAnnotationPresent(Skip.class);
            }
        });
    }
...
}
上面可以看出来,只要对于的处理器的方法上加了@Skip注解,则不会执行该方法而一般我们继承的ChannelInboundHandlerAdapter和ChannelOutboundHandlerAdapter的所有方法都被@Skip标记了,所以只有我们重写的方法不会被@Skip标记,才会允许执行。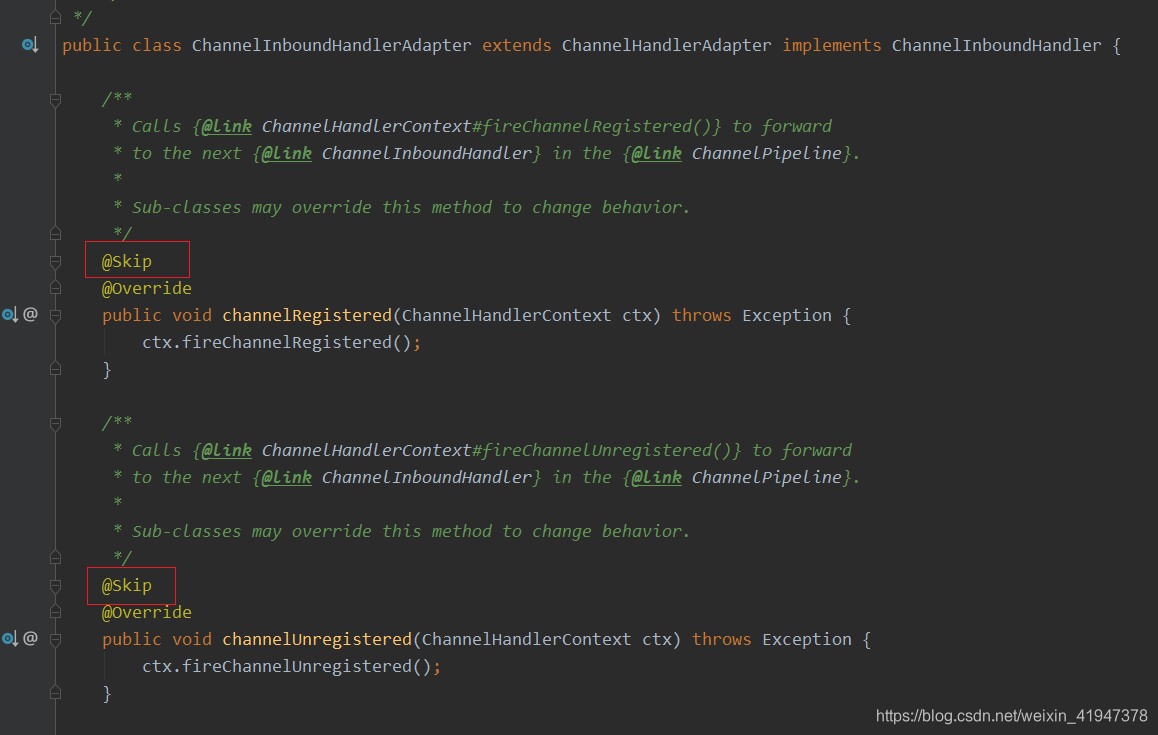
看下Head节点:
TailContext是一个ChannelInboundHandler
而HeadContext既是ChannelOutboundHandler又是ChannelInboundHandler
注意:ChannelOutboundHandler和ChannelInboundHandler是用来控制入栈和出栈相关的事件处理能力的,不代表当前节点在链表中的位置
final class HeadContext extends AbstractChannelHandlerContext
        implements ChannelOutboundHandler, ChannelInboundHandler {

    private final Unsafe unsafe;

    HeadContext(DefaultChannelPipeline pipeline) {
        super(pipeline, null, HEAD_NAME, HeadContext.class);
        //比尾节点多了一个Unsafe
        //因为它是一个ChannelOutboundHandler,ChannelOutboundHandler
        //里面有一堆方法bind,connect,disConnect,close等
        //这些方法都需要调用Unsafe执行
        unsafe = pipeline.channel().unsafe();
        setAddComplete();
    }
...
}
关于TailContext和HeadContext下一章还会详细说明。
2.2 ChannelInitializer源码分析
在介绍pipline添加处理器之前,先介绍一下处理器。
处理器分两类,一个是平常我们实现的继承ChannelOutboundHandlerAdapter和ChannelInboundHandlerAdapter的处理器,还有一个就是ChannelInitializer,它也继承 ChannelInboundHandlerAdapter,但它是一个特殊的处理器,叫做通道初始化器,他的生命周期和历史使命非常短暂,历史使命就是执行initChannel方法完成通道的初始化,执行完毕就会被销毁。
先了解一下ChannelInitializer
本身也是ChannelInboundHandlerAdapter,所以一旦添加成功和被删除,会触发下面指定的方法: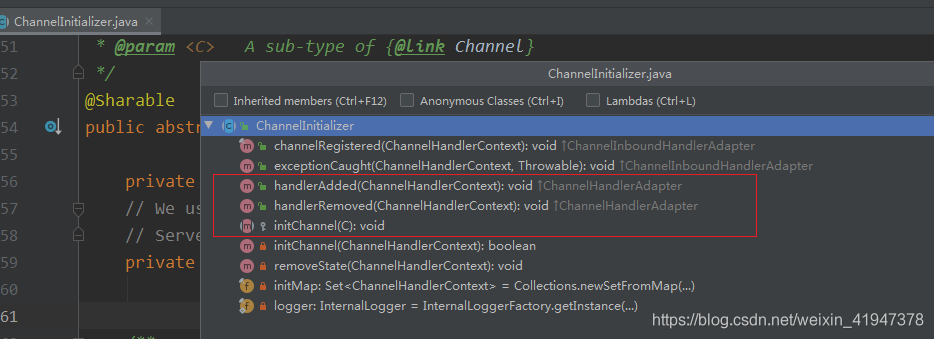
ChannelInitializer类上面有个注解:@Sharable
/**
 * Indicates that the same instance of the annotated {@link ChannelHandler}
 * can be added to one or more {@link ChannelPipeline}s multiple times
 * without a race condition.
 * 表明被该注解标记的{@link ChannelHandler}的相同实例可以在没有竞争条件
 * 的情况下多次添加到一个或多个{@link ChannelPipeline}中。
 * <p>
 * If this annotation is not specified, you have to create a new handler
 * instance every time you add it to a pipeline because it has unshared
 * state such as member variables.
 * 如果不加这个注解,每次添加到pipline都需要创建一个新的handle实例,因为状态不共享
 * <p>
 */
@Inherited
@Documented
@Target(ElementType.TYPE)
@Retention(RetentionPolicy.RUNTIME)
@interface Sharable {
    // no value
}

也可以将这个处理器实例添加到多个pipline上,ChannelInitializer就是这样用的,看下面分析:
那ChannelInitializer为什么要加这个注解?因为ChannelInitializer是被服务端接受的所有客户端连接的Channel所共享的
ChannelInitializer里面有一个很关键的成员变量initMap,也是被共享的,存放的是各个pipline中封装了当前ChannelInitializer处理器的节点:
@Sharable
public abstract class ChannelInitializer<C extends Channel> extends ChannelInboundHandlerAdapter {
...
    // We use a Set as a ChannelInitializer is usually shared between all Channels in a Bootstrap /
    // ServerBootstrap. This way we can reduce the memory usage compared to use Attributes.
    //我们使用一个Set集合作为通道初始化器,它通常在引导程序中的所有通道之间共享。
    //这样,与使用属性相比,我们可以减少内存的使用。
    //这个Set集合存放的是各个pipline中封装了当前ChannelInitializer处理器的节点!
    //即节点是多例的,节点内的handler是单例的,共享的
    private final Set<ChannelHandlerContext> initMap = Collections.newSetFromMap(
            new ConcurrentHashMap<ChannelHandlerContext, Boolean>());

    protected abstract void initChannel(C ch) throws Exception;
....
}
重要类,实例的数量关系:
NioEventLoopGroup在不指定的情况下默认有当前主机逻辑处理器数量的2倍的NioEventLoop,我的机器是32
ServerBootstrap.bind绑定端口的时候,即服务端每监听一个端口,会创建一个Channel,并在初始化的时候添加一个连接处理器,用来处理客户端的连接请求
即一个端口号,对应一个ServerChannel,一个ServerChannel会绑定一个连接处理器
每个端口上的连接处理器在接受到客户端的连接请求时,每一个连接请求都会创建一个NioSocketChannel,而在初始化这个NioSocketChannel的时候,所有端口上的连接处理器用的是同一个通道初始化器,回顾一下服务端Channel添加连接处理器的代码,如下:
//io.netty.bootstrap.ServerBootstrap#init
void init(Channel channel) throws Exception {
    // 处理bootstrap中的option设置属性
...

    // 处理bootstrap中的attr设置属性
...

    // 向pipeline中添加处理器
    ChannelPipeline p = channel.pipeline();

    // 获取bootstrap中设置的所有child开头的属性
    final EventLoopGroup currentChildGroup = childGroup;
    final ChannelHandler currentChildHandler = childHandler;
...
    // ChannelInitializer是一个处理器,其存在的意义是,为pipeline添加其它处理器
    p.addLast(new ChannelInitializer<Channel>() {
        @Override
        public void initChannel(final Channel ch) throws Exception {
            final ChannelPipeline pipeline = ch.pipeline();
            // 获取bootstrap中配置的handler()
            ChannelHandler handler = config.handler();
            if (handler != null) {
                pipeline.addLast(handler);
            }

            // ch.eventLoop()是获取到当前channel所绑定的evenLoop
            // 然后再使用该eventLoop所绑定的线程来执行指定的任务
            ch.eventLoop().execute(new Runnable() {
                @Override
                public void run() {
                    // 向pipeline中添加ServerBootstrapAcceptor处理器
                    // 该处理器用于处理client的连接
                    pipeline.addLast(new ServerBootstrapAcceptor(
                            ch, currentChildGroup, currentChildHandler, currentChildOptions, currentChildAttrs));
                }
            });
        }
    });
}

//当client发送来连接请求时,ServerBootstrapAcceptor处理器会触发channelRead()方法的执行
//io.netty.bootstrap.ServerBootstrap.ServerBootstrapAcceptor#channelRead
public void channelRead(ChannelHandlerContext ctx, Object msg) {
    // 注意,这里client发送来的就是连接当前Server的子channel
    final Channel child = (Channel) msg;

    // 初始化这个子channel
    // 对用于处理client 读写请求的子channel设置handler,以及添加到对应的selector中

    // 这个childHandler就是ServerBootstrap.childHandler设置的ChannelInitializer
    // 是被所有childChannel初始化时共享的!
    child.pipeline().addLast(childHandler);

    setChannelOptions(child, childOptions, logger);

    for (Entry<AttributeKey<?>, Object> e: childAttrs) {
        child.attr((AttributeKey<Object>) e.getKey()).set(e.getValue());
    }

    try {
        // 将当前子channel注册到selector
        childGroup.register(child).addListener(new ChannelFutureListener() {
            @Override
            public void operationComplete(ChannelFuture future) throws Exception {
                if (!future.isSuccess()) {
                    forceClose(child, future.cause());
                }
            }
        });
    } catch (Throwable t) {
        forceClose(child, t);
    }
}
关键几行代码就是:
final ChannelHandler currentChildHandler = childHandler;pipeline.addLast(new ServerBootstrapAcceptor(ch, currentChildGroup, currentChildHandler, currentChildOptions, currentChildAttrs));:child.pipeline().addLast(childHandler);
即ServerBootstrap.childHandler设置的ChannelInitializer,是被所有childChannel初始化时共享的!
2.2.1 ChannelInitializer的生命周期流程分析
再回到ChannelInitializer,它是一个ChannelInboundHandlerAdapter ,就有handlerAdded方法,当前处理器被成功添加到pipline的时候会触发,或者说当前处理器成功添加到Channel里面,这个方法就会被触发,而当当前处理器被移除的时候就会触发handlerRemoved方法:
PS:添加时机一种情况就是上面child.pipeline().addLast(childHandler);里面还有将处理器封装成节点的逻辑,后面跟
@Sharable
public abstract class ChannelInitializer<C extends Channel> extends ChannelInboundHandlerAdapter {
...
//initMap可以理解存放了 当前处理器封装的节点 的集合
    private final Set<ChannelHandlerContext> initMap = Collections.newSetFromMap(
            new ConcurrentHashMap<ChannelHandlerContext, Boolean>());

    protected abstract void initChannel(C ch) throws Exception;

    @Override
    public void handlerAdded(ChannelHandlerContext ctx) throws Exception {
    //已经添加成功了才会触发,所以处理器已经封装成节点了
        if (ctx.channel().isRegistered()) {
            // This should always be true with our current DefaultChannelPipeline implementation.
            // The good thing about calling initChannel(...) in handlerAdded(...) is that there will be no ordering
            // surprises if a ChannelInitializer will add another ChannelInitializer. This is as all handlers
            // will be added in the expected order.
            if (initChannel(ctx)) {

                // We are done with init the Channel, removing the initializer now.
                removeState(ctx);
            }
        }
    }
    @Override
    public void handlerRemoved(ChannelHandlerContext ctx) throws Exception {
        initMap.remove(ctx);
    }
    //先看initChannel方法:
    private boolean initChannel(ChannelHandlerContext ctx) throws Exception {
    //initMap添加的就是当前ChannelInitializer处理器所封装的节点
        if (initMap.add(ctx)) {
            try {
                // 调用自定义的ChannelInitializer实例的initChannel()方法
                // 该方法就是我们实现的
                initChannel((C) ctx.channel());
            } catch (Throwable cause) {
                // Explicitly call exceptionCaught(...) as we removed the handler before calling initChannel(...).
                // We do so to prevent multiple calls to initChannel(...).
                exceptionCaught(ctx, cause);
            } finally {
            //执行完以后从pipline中查找自己,有的话就删除
            //注意删除的是节点,不是当前处理器
                ChannelPipeline pipeline = ctx.pipeline();
                if (pipeline.context(this) != null) {
                    pipeline.remove(this);
                }
            }
            return true;
        }
        return false;
    }
    ...
}
可以看到,调用完ChannelInitializer实例的initChannel()方法后,就会执行删除的逻辑将自己封装的节点从pipline上删除,看下pipline是如何查找节点和删除节点的:
2.3 处理器的查找 和 删除
public class DefaultChannelPipeline implements ChannelPipeline {
    // 从pipeline中查找指定处理器对应节点
    public final ChannelHandlerContext context(ChannelHandler handler) {
        if (handler == null) {
            throw new NullPointerException("handler");
        }
//从head节点的下一个节点开始
        AbstractChannelHandlerContext ctx = head.next;
        for (;;) {

            if (ctx == null) {
                return null;
            }
//如果节点封装的处理器和我指定的处理器一样就返回
            if (ctx.handler() == handler) {
                return ctx;
            }

            ctx = ctx.next;
        }
    }

    public final ChannelPipeline remove(ChannelHandler handler) {
        // getContextOrDie(handler)  从pipeline中查找对应节点,如果查询不到会报错
        remove(getContextOrDie(handler));
        return this;
    }

    private AbstractChannelHandlerContext getContextOrDie(ChannelHandler handler) {
    //查找
        AbstractChannelHandlerContext ctx = (AbstractChannelHandlerContext) context(handler);
        if (ctx == null) {
        //为空,抛异常,就死了..
            throw new NoSuchElementException(handler.getClass().getName());
        } else {
            return ctx;
        }
    }
    //删除节点
    private AbstractChannelHandlerContext remove(final AbstractChannelHandlerContext ctx) {
    //断言,不满足条件,就抛出异常
        assert ctx != head && ctx != tail;

        synchronized (this) {
            // 从链表中删除节点
            remove0(ctx);

            // If the registered is false it means that the channel was not registered on an eventloop yet.
            // In this case we remove the context from the pipeline and add a task that will call
            // ChannelHandler.handlerRemoved(...) once the channel is registered.
            if (!registered) {
            //如果当前channel没有注册,处理一些异常情况
                callHandlerCallbackLater(ctx, false);
                return ctx;
            }
            //删除以后让执行器执行"修改节点状态"的任务
//ctx是一个节点,一个节点包含一个执行器,让执行器线程处理处理器的操作
//这个执行器和EventLoop默认是同一个
            EventExecutor executor = ctx.executor();
            //判断当前线程和执行器线程是不是同一个线程
            if (!executor.inEventLoop()) {
            //不是则用执行器线程执行
                executor.execute(new Runnable() {
                    @Override
                    public void run() {
                    //修改节点状态
                        callHandlerRemoved0(ctx);
                    }
                });
                return ctx;
            }
        }
        // 是则直接用执行器线程执行
        // 修改节点状态
        callHandlerRemoved0(ctx);
        return ctx;
    }

    private static void remove0(AbstractChannelHandlerContext ctx) {
        AbstractChannelHandlerContext prev = ctx.prev;
        AbstractChannelHandlerContext next = ctx.next;
        prev.next = next;
        next.prev = prev;
    }

    private void callHandlerRemoved0(final AbstractChannelHandlerContext ctx) {
        // Notify the complete removal.
        try {
            ctx.callHandlerRemoved();
        } catch (Throwable t) {
            fireExceptionCaught(new ChannelPipelineException(
                    ctx.handler().getClass().getName() + ".handlerRemoved() has thrown an exception.", t));
        }
    }
    ...
}
pipline删除节点后,可以看到会触发节点的callHandlerRemoved方法,该方法会修改节点的状态,并触发对应的处理器的handlerRemoved方法:
abstract class AbstractChannelHandlerContext implements ChannelHandlerContext, ResourceLeakHint {
    final void callHandlerRemoved() throws Exception {
        try {
            // Only call handlerRemoved(...) if we called handlerAdded(...) before.
            if (handlerState == ADD_COMPLETE) {
            // 修改状态前会触发对应处理器的handlerRemoved方法
                // 触发当前节点处理器中重写的handlerRemoved()
                // 即又回到io.netty.channel.ChannelInitializer#handlerRemoved方法
                handler().handlerRemoved(this);
            }
        } finally {
            // Mark the handler as removed in any case.
            // 修改处理器状态为已删除
            setRemoved();
        }
    }
    //替换状态
final void setRemoved() {
        handlerState = REMOVE_COMPLETE;
    }
    ...
}

public abstract class ChannelInitializer<C extends Channel> extends ChannelInboundHandlerAdapter {
...
//即又回到io.netty.channel.ChannelInitializer#handlerRemoved方法
    public void handlerRemoved(ChannelHandlerContext ctx) throws Exception {
    //从initMap删除节点
    //ctx节点是多例的!ChannelInitializer是共享的,是单例的!
    //所以节省内存
        initMap.remove(ctx);
    }
}
io.netty.channel.ChannelInitializer#initChannel(io.netty.channel.ChannelHandlerContext)跟完了,再看下io.netty.channel.ChannelInitializer#removeState方法:这个方法触发意义在于为了保险,如果ChannelInitializer处理器handlerRemoved方法被重写,没有删除的情况,也能保证删除
public abstract class ChannelInitializer<C extends Channel> extends ChannelInboundHandlerAdapter {
...
    @Override
    public void handlerAdded(ChannelHandlerContext ctx) throws Exception {
        if (ctx.channel().isRegistered()) {
            // This should always be true with our current DefaultChannelPipeline implementation.
            // The good thing about calling initChannel(...) in handlerAdded(...) is that there will be no ordering
            // surprises if a ChannelInitializer will add another ChannelInitializer. This is as all handlers
            // will be added in the expected order.
            if (initChannel(ctx)) {

                // We are done with init the Channel, removing the initializer now.
                removeState(ctx);
            }
        }
    }
    private void removeState(final ChannelHandlerContext ctx) {
        // The removal may happen in an async fashion if the EventExecutor we use does something funky.
    //判断节点状态
        if (ctx.isRemoved()) {
            initMap.remove(ctx);
        } else {
            // The context is not removed yet which is most likely the case because a custom EventExecutor is used.
            // Let's schedule it on the EventExecutor to give it some more time to be completed in case it is offloaded.
            ctx.executor().execute(new Runnable() {
                @Override
                public void run() {
                    initMap.remove(ctx);
                }
            });
        }
    }
    ...
}

//io.netty.channel.AbstractChannelHandlerContext#isRemoved
public boolean isRemoved() {
//判断状态是否移除成功
    return handlerState == REMOVE_COMPLETE;
}
2.4 处理器的添加
现在看一下pipline是如何添加处理器的,pipline中有很多add方法可以添加处理器:
我们以常用的io.netty.channel.DefaultChannelPipeline#addLast(java.lang.String, io.netty.channel.ChannelHandler)开始分析:
public class DefaultChannelPipeline implements ChannelPipeline {
...
    public final ChannelPipeline addLast(ChannelHandler... handlers) {
        return addLast(null, handlers);
    }

    public final ChannelPipeline addLast(EventExecutorGroup executor, ChannelHandler... handlers) {
        if (handlers == null) {
            throw new NullPointerException("handlers");
        }

        for (ChannelHandler h: handlers) {
            if (h == null) {
                break;
            }
            addLast(executor, null, h);
        }

        return this;
    }

//name可以为处理器指定名称
    public final ChannelPipeline addLast(EventExecutorGroup group, String name, ChannelHandler handler) {
        final AbstractChannelHandlerContext newCtx;
        synchronized (this) {
            // 检测处理器是否被重复添加
            checkMultiplicity(handler);

            // 将处理器封装为节点
            newCtx = newContext(group, filterName(name, handler), handler);

            // 将新建节点添加到链表尾部
            addLast0(newCtx);

            // If the registered is false it means that the channel was not registered on an eventLoop yet.
            // In this case we add the context to the pipeline and add a task that will call
            // ChannelHandler.handlerAdded(...) once the channel is registered.
            // 如果registered为false,则意味着该通道尚未在eventLoop上注册。
            // 在本例中,我们将上下文添加到管道中,并添加一个在注册了通道后
            // 调用ChannelHandler.handlerAdded(…)的任务。
            if (!registered) {
                newCtx.setAddPending();
                callHandlerCallbackLater(newCtx, true);
                return this;
            }

            EventExecutor executor = newCtx.executor();
            if (!executor.inEventLoop()) {
                callHandlerAddedInEventLoop(newCtx, executor);
                return this;
            }
        }
        // 修改状态,触发handlerAdded()方法的执行
        callHandlerAdded0(newCtx);
        return this;
    }
    ...
}
大致分为四个核心流程:
- (1) 检查处理器是否被多次添加
- (2) 创建新节点
- (3) 插入新节点
- (4) 执行 handlerAdded()回调
(1) 检查处理器是否被多次添加
checkMultiplicity(handler);
public class DefaultChannelPipeline implements ChannelPipeline {
...
    private static void checkMultiplicity(ChannelHandler handler) {
        if (handler instanceof ChannelHandlerAdapter) {
            ChannelHandlerAdapter h = (ChannelHandlerAdapter) handler;
            // 若不能共享且已经被添加过了
            if (!h.isSharable() && h.added) {
                throw new ChannelPipelineException(
                        h.getClass().getName() +
                        " is not a @Sharable handler, so can't be added or removed multiple times.");
            }
            h.added = true;
        }
    }
    ...
}
(2) 创建新节点
newCtx = newContext(group, filterName(name, handler), handler);
先看filterName,生成处理器名称(作为节点名称):
public class DefaultChannelPipeline implements ChannelPipeline {
...
    private String filterName(String name, ChannelHandler handler) {
        // 若没有为处理器指定名称,则自动生成一个名称
        if (name == null) {
            return generateName(handler);
        }
        // 若指定了名称,则需要检测名称是否重复
        checkDuplicateName(name);
        return name;
    }
    private String generateName(ChannelHandler handler) {
        Map<Class<?>, String> cache = nameCaches.get();
        Class<?> handlerType = handler.getClass();
        // 从缓存中获取指定处理器的名称
        String name = cache.get(handlerType);
        // 若这个名称为null,则生成一个
        if (name == null) {
            name = generateName0(handlerType);
            cache.put(handlerType, name);
        }
        // 判断并处理生成的名称重复问题(只和pipline链上的节点判断)
        if (context0(name) != null) {
            // 去掉最后一个数字
            String baseName = name.substring(0, name.length() - 1); // Strip the trailing '0'.

            for (int i = 1;; i ++) {
                String newName = baseName + i;
                if (context0(newName) == null) {
                    name = newName;
                    break;
                }
            }
        }
        return name;
    }
    private static String generateName0(Class<?> handlerType) {
        // 命名规则为:处理器简单类名后跟#0
        return StringUtil.simpleClassName(handlerType) + "#0";
    }
    //查找pipline中是否有重名的处理器节点
    private AbstractChannelHandlerContext context0(String name) {
        // 从head节点的下一个节点开始遍历
        AbstractChannelHandlerContext context = head.next;
        while (context != tail) {
            if (context.name().equals(name)) {
                // 返回节点实例,说明名称已冲突
                return context;
            }
            context = context.next;
        }
        // 返回null,说明名称不冲突
        return null;
    }

//如果指定了名称,发现名称重复会报错
    private void checkDuplicateName(String name) {
        if (context0(name) != null) {
            throw new IllegalArgumentException("Duplicate handler name: " + name);
        }
    }
    ...
}
即如果不指定,默认处理器名为:处理器简单类名后跟#0,如果已经存在,0递增#1,#2…
如果指定了名称,发现名称重复会报错
在看newContext创建节点:
public class DefaultChannelPipeline implements ChannelPipeline {
...
    private AbstractChannelHandlerContext newContext(EventExecutorGroup group, String name, ChannelHandler handler) {
    //构造需要一个pipline,一个执行器,节点名,处理器
    //创建节点是new,关键要看childExecutor,节点的执行器初始化时机就在这
        return new DefaultChannelHandlerContext(this, childExecutor(group), name, handler);
    }

    private EventExecutor childExecutor(EventExecutorGroup group) {
    //通常情况是null,如果是null,则默认用的是当前channel的eventloop
    //如果我们指定了group,我们分析一下
        if (group == null) {
            return null;
        }
        // 该值用于决定是否为每个group固定一个executor
        // pin:固定的意思
        Boolean pinEventExecutor = channel.config()
                .getOption(ChannelOption.SINGLE_EVENTEXECUTOR_PER_GROUP);
        // 若pinEventExecutor的值为false,则不为group绑定executor,就会为每一个
        // 节点从group中轮询一个executor
        // 如果不是固定,就走group.next()
        if (pinEventExecutor != null && !pinEventExecutor) {
            return group.next();
        }

        // 若pinEventExecutor的值为true,则为每一个group固定一个不变的executor
        // map的key为group,value为其指定的用于固定的executor
        Map<EventExecutorGroup, EventExecutor> childExecutors = this.childExecutors;
        if (childExecutors == null) {
            // Use size of 4 as most people only use one extra EventExecutor.
            childExecutors = this.childExecutors =
                    new IdentityHashMap<EventExecutorGroup, EventExecutor>(4);
        }
        // Pin one of the child executors once and remember it so that the same child executor
        // is used to fire events for the same channel.
        EventExecutor childExecutor = childExecutors.get(group);
        if (childExecutor == null) {
            childExecutor = group.next();
            childExecutors.put(group, childExecutor);
        }
        return childExecutor;
    }
    ...
}

//看下DefaultChannelHandlerContext的构造:
final class DefaultChannelHandlerContext extends AbstractChannelHandlerContext {

    private final ChannelHandler handler;

    DefaultChannelHandlerContext(
            DefaultChannelPipeline pipeline, EventExecutor executor, String name, ChannelHandler handler) {
        //通常没有特殊设置,executor是null
        super(pipeline, executor, name, handler.getClass());
        this.handler = handler;
    }

//super的构造
    AbstractChannelHandlerContext(DefaultChannelPipeline pipeline, EventExecutor executor,
                                  String name, Class<? extends ChannelHandler> handlerClass) {
        this.name = ObjectUtil.checkNotNull(name, "name");
        this.pipeline = pipeline;
        this.executor = executor;
        // 初始化执行标识
        this.executionMask = mask(handlerClass);
        // Its ordered if its driven by the EventLoop or the given Executor is an instanceof OrderedEventExecutor.
        ordered = executor == null || executor instanceof OrderedEventExecutor;
    }
...
}
PS:netty的pipeline上的节点所绑定的执行器是是什么时候初始化的?addLast的时候传的是null啊
一般不用初始化,如果addLast的时候没有指定,那么节点在使用执行器的时候,直接用节点绑定的Channel的EventLoop:
abstract class AbstractChannelHandlerContext implements ChannelHandlerContext, ResourceLeakHint {
...
    public EventExecutor executor() {
        if (executor == null) {
            return channel().eventLoop();
        } else {
            return executor;
        }
    }
    ...
}
(3) 插入新节点
addLast0(newCtx);
public class DefaultChannelPipeline implements ChannelPipeline {
...
    private void addLast0(AbstractChannelHandlerContext newCtx) {
        AbstractChannelHandlerContext prev = tail.prev;
        newCtx.prev = prev;
        newCtx.next = tail;
        prev.next = newCtx;
        tail.prev = newCtx;
    }
    ...
}
(4) 执行 handlerAdded()回调
callHandlerAddedInEventLoop(newCtx, executor);
public class DefaultChannelPipeline implements ChannelPipeline {
...
    private void callHandlerAddedInEventLoop(final AbstractChannelHandlerContext newCtx, EventExecutor executor) {
        newCtx.setAddPending();
        executor.execute(new Runnable() {
            @Override
            public void run() {
                callHandlerAdded0(newCtx);
            }
        });
    }
    private void callHandlerAdded0(final AbstractChannelHandlerContext ctx) {
        try {
        //触发节点处理器的handlerAdded方法
            ctx.callHandlerAdded();
        } catch (Throwable t) {
            boolean removed = false;
            try {
                remove0(ctx);
                //如果发生异常会删除节点,触发处理器的HandlerRemoved方法
                ctx.callHandlerRemoved();
                removed = true;
            } catch (Throwable t2) {
                if (logger.isWarnEnabled()) {
                    logger.warn("Failed to remove a handler: " + ctx.name(), t2);
                }
            }

            if (removed) {
            //处理节点处理器ExceptionCaught方法
                fireExceptionCaught(new ChannelPipelineException(
                        ctx.handler().getClass().getName() +
                        ".handlerAdded() has thrown an exception; removed.", t));
            } else {
                fireExceptionCaught(new ChannelPipelineException(
                        ctx.handler().getClass().getName() +
                        ".handlerAdded() has thrown an exception; also failed to remove.", t));
            }
        }
    }
    ...
}
看下上面调用节点的各个方法具体实现:
//上面调用节点对应各种回调方法:
abstract class AbstractChannelHandlerContext implements ChannelHandlerContext, ResourceLeakHint {
...
//修改节点状态为添加中
    final void setAddPending() {
        boolean updated = HANDLER_STATE_UPDATER.compareAndSet(this, INIT, ADD_PENDING);
        assert updated; // This should always be true as it MUST be called before setAddComplete() or setRemoved().
    }
    //触发处理器添加成功的方法
    final void callHandlerAdded() throws Exception {
        // We must call setAddComplete before calling handlerAdded. Otherwise if the handlerAdded method generates
        // any pipeline events ctx.handler() will miss them because the state will not allow it.
        if (setAddComplete()) {
            // 触发处理器的handlerAdded()方法的执行
            handler().handlerAdded(this);
        }
    }
    //修改节点状态为添加成功
    final boolean setAddComplete() {
        for (;;) {
            int oldState = handlerState;
            if (oldState == REMOVE_COMPLETE) {
                return false;
            }
            // Ensure we never update when the handlerState is REMOVE_COMPLETE already.
            // oldState is usually ADD_PENDING but can also be REMOVE_COMPLETE when an EventExecutor is used that is not
            // exposing ordering guarantees.
            if (HANDLER_STATE_UPDATER.compareAndSet(this, oldState, ADD_COMPLETE)) {
                return true;
            }
        }
    }
    ...
}
原文地址:https://blog.csdn.net/weixin_41947378/category_10273110.html